Class Logistics and Equipment List

SCENTINEL NOSE WORK DOG TRAINING
CLASS LOGISTICS AND EQUIPMENT LIST FOR INTRODUCTION TO HUNTING CLASSES
***ADDENDUM***
EQUIPMENT LIST FOR INTRODUCTION TO ODOR CLASSES
Scentinel Nose Work Dog Training is thrilled to offer a six-week course entitled,“K9 Nose Work Class Level I: Introduction to Hunting.” We know that this training will be the start of a new canine training adventure for you and that these classes will serve to strengthen the working relationship between you and your companion dog.
To maximize your training experience, we would like to ask you to review the following Logistical Information and to bring the equipment as identified on the following Equipment List. If there is any equipment that you don’t have, please email Gail at scentinelnosework@gmail.com and we can discuss where you can obtain the necessary equipment.
The Logistics for each class is as follows:
- K9 Nose Work classes are unique in that only one dog will work at a time and there can be no other dogs in the room while the dog is searching. This is because a dog will only search when that dog feels safe and the dog may not feel comfortable when another dog is in the room. Equally important, a dog will only search well when that dog is focused on his work and the presence of another dog in the room may be too distracting to that dog. So, only one dog will be trained at a time.
- Detection dog training also is unique in that you cannot “drill” a detection dog. Rather, the training needs to empower the dog and must be designed to leave the dog wanting more. To do that, we will be training the dog in quick short bursts. Over time, the dog will be able to search for longer period of times but, at the start of your dog’s training, you will be building your dog’s “willingness to search for you” by training at home for only five to six minutes per day. And, in class, you may only work your dog ten minutes or so. But, when not working your dog, you should watch the other dogs work so that you begin to educate “your eye” as to when a dog is hunting and when that dog is not.
- When not working your dog, you may bring and set up your own crate in the training facility. Alternately, you may keep your dog in your car when not working your dog. But, only stage your dog in your car if you can provide proper ventilation, shade and water, and use equipment designed to cool the interior of your vehicle as necessary. If it is hot outside, we recommend that you bring a crate that you can set up in the training facility.
- As you will need to organize your equipment at the start of each class and as your K9 Nose Work Instructor will need time to describe on what you will be working in each class, please crate your dog in the training facility or stage your dog in your car at the start of each class and come into the Training Room without your dog.
The Equipment that you will need for each class is:
- Flat Nylon or Leather Collar/Harness. Other than walking the dog into and out of the building, please do not use prong collars, Halti Head Collars, Gentle Leaders or Easy Walk Harnesses as one of the goals of this training is to get your dog working freely and independently. While there is a place for these pieces of equipment, they tend to restrict the dog, both mentally and physically. So, they are not appropriate to use while the dog is working. Please select a flat nylon or leather collar for your dog that you will only use when training your dog. A normal, well-fitted harness also is acceptable to use.
- 6’ Leash. A light-weight leather or nylon leash of approximately 6’ in length. Please make sure that there is nothing attached to the leash that could distract the dog.
- 10’ – 12’ Leash. A light-weight leather or nylon leash of approximately 10’ to 12’ in length.
- Please do not forget to bring water for your dog.
- Salient Treats. Because we are building your dog’s desire to hunt, it is VERY important that you bring rewards that your dog really, REALLY wants!!! The more that the dog wants the reward, the more intense its hunting behavior will be. So, do not bring plain, boring kibble or dog cookies, even if they are a high-end kibble or dog cookie. Bring something that is moist. But, for health concerns, please do not bring raw meats to class. Bring only cooked foods. Chop the treats up into small pieces and bring it all with you in a plastic Tupperware container. Bring approximately 1½ cups of treats. If your dog is not a food dog, that is ok – bring that dog’s most “favored toy.” If your dog wants that toy, we can utilize a toy in our training system as well. Also, make sure that whatever food you bring with you to reward your dog is VERY, VERY, VERY SMELLY!!! We do not want the dog to “wonder” what he is doing when he walks into the Training Room. We want the odor of the reward food to “hit him in the face (so to speak)” so that he will “know” that his reward food is out there in the Training Room. All he will need to do is find it!!! And so, as any dog can find even a muffin crumb on the floor, this initial training will be easy!!! Please note that THE BEST reward food that you can use is Al Fresca Garlic Sausage and we STRONGLY encourage you to select this food when rewarding your dog. It comes in packages of four sausages and is sold by Stop and Shop, Roche Brothers, Sudbury Farms etc. Microwave all four sausages for 3 ½ minutes. When cool, slice each sausage into four long lengths of equal size and then slice each long length into thin pieces. Put all of the small pieces into one Tupperware container and bring that container with you to class. Make sure that your dog KNOWS how wonderful this reward is by using it as a reward for some other behavior your dog knows well at home. For example, ask your dog to sit and then use the sausage to reward a great response. Al Fresca Garlic Sausage is a powerful reward food….so you should see your dog light up!!!! Once your dog knows how good Al Fresca Garlic Sausage is, only use this food when doing K9 Nose Work training.
- Small Bait Bag: You will wear this bag from the start of classes and you will supplement the dog’s reward from your Bait Bag in later classes.
- Two Small Metal Bowls. To keep things moving efficiently through the class, please bring two small metal bowls that do not exceed 6 inches wide or 3 inches high. You will fill the bowls with your Salient Treats when you and your dog are “on deck.”
- Motivated Dog. Again, since we are building your dog’s desire to hunt, it is ALSO VERY important that your dog is hungry when he comes to class and that he is not tired. A dog that is “full” is not a dog that will want to work. It will not hurt your dog to not feed it breakfast on the day you come to class and CERTAINLY don’t feed it dinner before trying to train. Similarly, a dog that is tired is not a dog that will want to work. So, please don’t take your dog on a long walk or play ball with it on the days you come to class. We want a dog that wants to work! So, keep your dog hungry and energized on the days you come to class and learning will go much faster!
- After the first class, you will need to purchase 10 boxes for training at home. The box should have a lid that can cover the entire top of the bottom portion of the box. Staples’ white Mailing Boxes works perfectly but any set of identical boxes with lids will work! The link for the boxes we use is: http://www.staples.com/Staples-White-Corrugated-Mailers-9-x-6-1-2-x-2-3/product_414173?cmArea=SEARCH Keep one box as your Hot Box which you will use for your food reward. Keep this box completely separate from the Cold, or neutral, Boxes.
***ADDENDUM***
EQUIPMENT USED FOR
INTRODUCTION TO ODOR CLASSES
The following is the main equipment that you will need for my Level 3 and Level 4 classes which focus on the “Introduction of Odor” to your dog. I have indicated whether you will need to bring this equipment to class or only use at home.
The Equipment that you will need for each class is:
- Flat Nylon or Leather Collar/Harness. Other than walking the dog into and out of the building, please do not use prong collars, Halti Head Collars, Gentle Leaders or Easy Walk Harnesses as one of the goals of this training is to get your dog working freely and independently. While there is a place for these pieces of equipment, they tend to restrict the dog, both mentally and physically. So, they are not appropriate to use while the dog is working. Please select a flat nylon or leather collar for your dog that you will only use when training your dog. A normal, well-fitted harness also is acceptable to use.
- 6’ Leash. A light-weight leather or nylon leash of approximately 6’ in length. Please make sure that there is nothing attached to the leash that could distract the dog.
- 10’ – 12’ Leash. A light-weight leather or nylon leash of approximately 10’ to 12’ in length.
- Water. Please do not forget to bring water for your dog.
- Salient Treats. Because we are building your dog’s desire to hunt, it is VERY important that you bring rewards that your dog really, REALLY wants!!! The more that the dog wants the reward, the more intense its hunting behavior will be. So, do not bring plain, boring kibble or dog cookies, even if they are a high-end kibble or dog cookie. Bring something that is moist. But, for health concerns, please do not bring raw meats to class. Bring only cooked foods. Chop the treats up into small pieces and bring it all with you in a plastic Tupperware container. Bring approximately 1½ cups of treats. If your dog is not a food dog, that is ok – bring that dog’s most “favored toy.” If your dog wants that toy, we can utilize a toy in our training system as well. Also, make sure that whatever food you bring with you to reward your dog is VERY, VERY, VERY SMELLY!!! We do not want the dog to “wonder” what he is doing when he walks into the Training Room. We want the odor of the reward food to “hit him in the face (so to speak)” so that he will “know” that his reward food is out there in the Training Room. All he will need to do is find it!!! And so, as any dog can find even a muffin crumb on the floor, this initial training will be easy!!! Please note that THE BEST reward food that you can use is Al Fresca Garlic Sausage and we STRONGLY encourage you to select this food when rewarding your dog. It comes in packages of four sausages and is sold by Stop and Shop, Roche Brothers, Sudbury Farms etc. Microwave all four sausages for 3 ½ minutes. When cool, slice each sausage into four long lengths of equal size and then slice each long length into thin pieces. Put all of the small pieces into one Tupperware container and bring that container with you to class. Make sure that your dog KNOWS how wonderful this reward is by using it as a reward for some other behavior your dog knows well at home. For example, ask your dog to sit and then use the sausage to reward a great response. Al Fresca Garlic Sausage is a powerful reward food….so you should see your dog light up!!!! Once your dog knows how good Al Fresca Garlic Sausage is, only use this food when doing K9 Nose Work training. You can read more about the power of this reward food by visiting my website and clicking on the following link: http://www.scentinelnosework.com/how-to-prepare-food-rewards-for-class/
- Small Bait Bag. You will wear this bag from the start of classes and you will supplement the dog’s reward from your Bait Bag in later classes.
- Motivated Dog. Again, since we are building your dog’s desire to hunt, it is ALSO VERY important that your dog is hungry when he comes to class and that he is not tired. A dog that is “full” is not a dog that will want to work. It will not hurt your dog to not feed it breakfast on the day you come to class and CERTAINLY don’t feed it dinner before trying to train. Similarly, a dog that is tired is not a dog that will want to work. So, please don’t take your dog on a long walk or play ball with it on the days you come to class. We want a dog that wants to work! So, keep your dog hungry and energized on the days you come to class and learning will go much faster!
The following is the additional equipment that you will need for training at home:
- Essential Oils of Birch, Anise and Clove. To help our dogs learn, I absolutely believe that there should be sufficient odor on the Q-tips so that you can smell the odor when imprinting the novice dog. So, start with enough odor that you can smell the Q-tips when held 2-3 inches away from your nose. The odor should not be so strong that it could be overwhelming to the dog, but sufficient that you can catch the odor easily. This is what we did for HRD training as well. We did not start with a speck of tissue when starting our novice cadaver dogs! :):) With that, please buy your oils only from All Good Dogs website (http://www.allgooddogs.biz/product ) or from Especially for Pets Sudbury (they are currently sold out and it is not known when they will restock). Both of these establishments stock the oils that NACSW uses in its competitions. This is important because oils from different companies are “cut” with different things and you don’t want to imprint your dogs on something that will make recognizing oils used in competition harder. Remember, dogs don’t generalize scent well until they have been in training for a while. So, use the proper oils from the beginning of your dog’s training!!!
- Q-Tips. In making scented Q-tips, I use 100% Johnson & Johnson cotton Q-tips. Do not use the type of Q-tips that have a plastic or wooden stick in them – they could be very dangerous if your dog were to eat such a Q-tips (and sometimes this happens!!). Cut the Q-tips in half for general training past Level 3 and Level 4 classes. While participating in Level 3 and Level 4 classes, do not bother cutting the Q-tips in half as you can use whole Q-tips during this level of training.
- Glass Jars. Using an unused glass canning jar with metal lid. The jelly jars you can buy at hardware stores work the best. Buy the three of 4 0z jelly jars and three of the 8 0z jelly jar.
- How To Make Scented Q-Tips. Dribble 10-20 drops of oil along the inside sides of a 4 oz jelly jar. Place 50 +/- ½ Q-tips in the 4 oz jelly jar and shake. Put an equivalent number of whole Q-tips and oil in an 8 oz jelly jar if you are enrolled in Level 3 or Level 4 classes. (Do not take the time to cut Q-tips when training in Level 3 or Level 4 classes). Let the Q-tips “sit” for 24 hours before using the Q-tips. Again, if just using the Q-tips in my “bowl sandwich,” no need to take the time to cut the Q-tips in half – just use the whole Q-tips.
- Bowl Sandwich. For my Level 3 and Level 4 trainings, you will be using something that I have nicknamed the “bowl sandwich.” Many people have “copied” my idea and there are many different versions now available commercially, but attached below are photographs of the original “bowl sandwich:

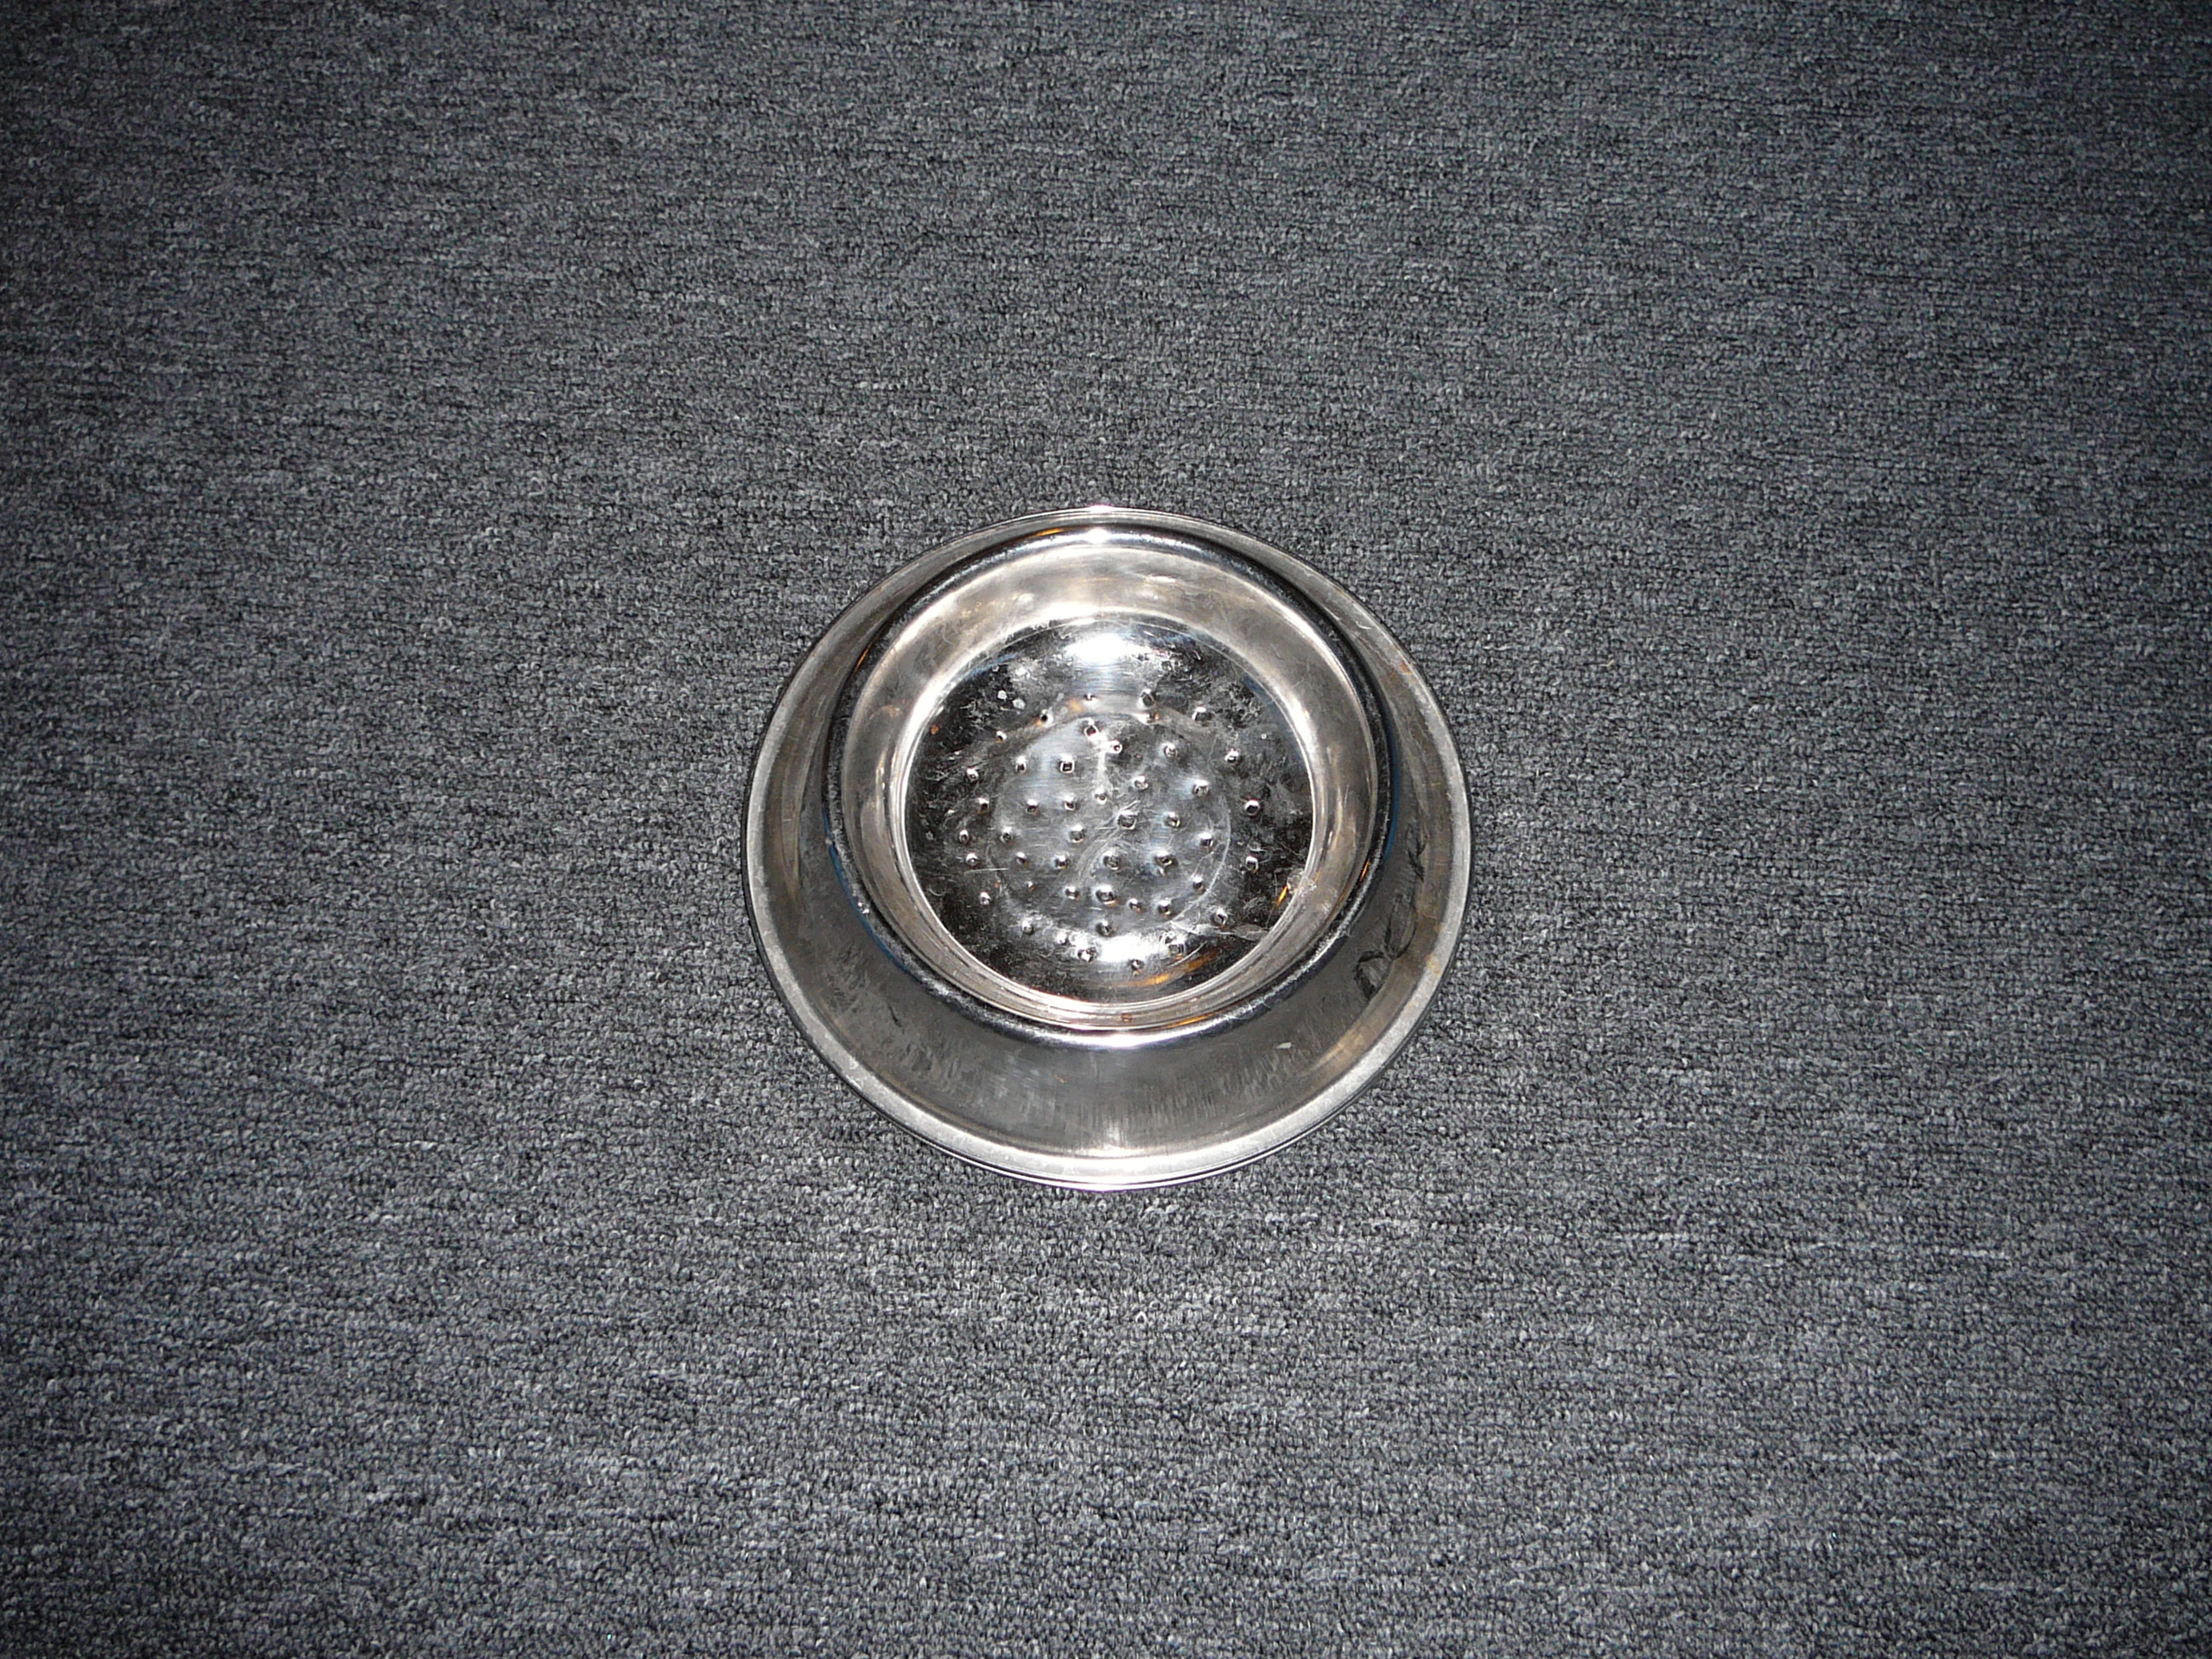
To make my “bowl sandwich,” you will need to buy two bowls that like these ones:
http://www.petco.com/product/105768/Petco-Stainless-Steel-Non-Tip-Bowls.aspx
I typically use the 16 oz. size. Remove the rubber edging along the bottom of each bowl and throw them away. You will not need them and you do not want your dog to imprint on the odor of the rubber!! 🙂 Take a hammer and good-size nail and hammer in holes in the bowl section of one of the bowls. I typically hammer in 20-25 holes in the belly of the bowl. Make sure you hammer into the bowl so that the burrs made when the holes are hammered in are on the outside of the bowl and not sticking up into the inside of the bowl. For this reason, do NOT use a drill to make the holes because you end up with burrs on both sides of the bowl!! Once you have the holes punched into one of the bowls, layer your scented q-tips into the bowl section of the other bowl. Place the bowl with the holes on top of the bowl containing the scented q-tips. You now have created my “bowl-sandwich” out of the two nested bowls. When using the bowls to “pair,” simply sprinkle 5-6 pieces of the stinky reward-food (or the toy) into the top bowl of the “bowl-sandwich” and place the “bowl-sandwich” into a box (“hot-box”) and shut the lid. When the dog finds the “hot-box,” immediately open the lid and allow the dog to self-reward on the food. When the dog has finished self-rewarding, drop anywhere from 5 to 40 pieces of food in the top bowl, one piece at a time (i.e., “supplementally-reward”). Keep the amount unpredictable but the reinforcement over odor should be more, not less, in this early stage. You are imprinting value on the odor, so make it a super strong association with heavy reinforcement. Also, make sure that the hand that is dropping the food into the bowl does not move further away from the top bowl than 2 inches because you want the dog’s nose to stay in the top bowl and not swivel back and forth following the hand that is dropping in the food. The dog must learn that he gets the food in the bowl and not from your hand and start to orient to the bowl more and more. Each time you repeat this training, the dog will be inhaling the odor of birch (or anise or clove) as the dog is self-rewarding and then being supplementally-rewarded. The longer you have the dog inhaling the odor while he is being rewarded the stronger the association between the odor of birch and the salient reward will become.
- White Boxes. You will need to purchase 10 boxes which you will use for training at home. The box should have a lid that can cover the entire top of the bottom portion of the box. Staples’ white Mailing Boxes works perfectly but any set of identical boxes with lids will work! The link for the boxes we use is: http://www.staples.com/Staples-White-Corrugated-Mailers-9-x-6-1-2-x-2-3/product_414173?cmArea=SEARCH Keep one box as your Hot Box which you will use for your odor. Keep this box completely separate from the Cold, or neutral, Boxes.
Well, that’s it – have fun and enjoy the journey of creating an “odor-obedient” dog!!
Gail McCarthy
![]()